
The Blog

Eastern Block Cuisine
I’m ashamed to say that up until recently I knew very little about Eastern Europe aside from war and disaster. I certainly had no understanding of their cuisine! We were drawn to Poland to visit Auschwitz, Ukraine to visit Chernobyl and Romania to see wild bears. But it wasn’t until we arrived in each of these countries that we realised that catastrophic events aside (not including the bears in this of course), lay beautiful cities, friendly locals, traditions not yet lost and hearty tasty and very cheap food!
Join me on an adventure of Eastern Europe by trying out some of the below recipes at home.
What's in this post:
Ukraine
My first impression of Ukraine, and particularly Kyiv, was grey and bleak. Big soviet buildings blocking the sun, new grey high rise buildings, grey side walks and leafless trees (it was winter). However, after three days of exploring, I learnt that I couldn’t be further from the truth. Kyiv is a vibrant colourful city thanks to its mesmerising (but also tragic) history. They have been invaded repeatedly over the years from every possible direction, each newcomer leaving their mark.

Just like their architecture, Ukrainian cuisine has been heavily influenced by other countries, however, how the dishes are prepared is distinctly Ukrainian.
We went to Ukraine to visit Chernobyl which was a sobering experience. The vodka consumed whilst in Kyiv however was certainly not! They drink vodka like I drink water, and it was in fact cheaper! 50p for a shot, which resembled more a half pint than it did a shot! And the thing is, they drink it like we do beer, or soft drinks even! You have it as an accompaniment to specific dishes and you don’t down it, you sip it. Of course we tried a variety of them whilst there, including the spicy one (which I don’t recommend!).
Vodka aside, I wasn’t sure what to expect culinary wise from Kyiv, but we certainly ate like kings for next to nothing. I wish we would have done a food tour to learn more about the cuisine, as our meals were very heavily meat based (lots of sausage!). However, I’m not going to complain as it was all incredibly tasty!
Below are my two favourite dishes from the trip:
Chicken Kiev
It seems obvious I should pick it, but when you are in Kyiv you have to try Chicken Kiev! I’m not even so sure it actually originated in Kyiv (neither does the internet), however, there is no denying it is one of the best comfort foods. Did you know it was the first ever refrigerated “ready meal” in the UK? Apparently M&S started selling it in 1979!
Rather than indulging in a ready made option, why not make a high quality version instead?
This recipe is Natasha Kravchuk’s and can be found on her website Natasha’s Kitchen. It is a great resource as she includes images of the cooking process, which is particularly handy for knowing where and how to cut the holes!
Chicken Kiev Recipe
Serves 6
Ingredients for Chicken
- 3 large chicken breasts
- 2 eggs, beaten
- 60 g of flour
- 240 g breadcrumbs
- Salt and Pepper to taste
- Extra light olive oil to sauté
Ingredients for Filling
- 6 tbsp unsalted butter
- 1 large garlic clove, minced
- 1 tbsp lemon juice (plus more to dibble over Kiev to serve)
- 2 tbsp chopped fresh parsley
- ½ tsp salt
- ½ tsp black pepper
Preparation
- Mash together all the filling ingredients using a fork until the lemon and butter blend in together
- Using a sharp knife cut each chicken breast in half lengthwise, keeping both halves equal in size and thickness
- Cut a 2×3” pocket in each chicken breast taking care not to cut through the chicken breast entirely
- Stuff each chicken breast with 1 tablespoon of filling, then close the breast and push down to disperse the filling
- Season each side of the breast to your liking
- Dredge chicken in flour, dusting off the any excess, then dip in eggs before dipping it finally in the breadcrumbs.
- Heat the oil in a deep skillet or pan (so that if you drop a breadcrumb in the oil, it sizzles).
- Add chicken in a single layer and fry until it is golden on both sides (about 4 minutes each side)
- Season the fried chicken with a sprinkle of salt, garnish with fresh parsley and squeeze some lemon juice over the top before serving.

Rabbit Stew
My favourite dish of the trip however was a Rabbit Stew. It’s not a meat I often eat as it isn’t readily available in the UK, however you should be able to get it from local butchers or online from Wild Meat. The great thing about rabbit is that it’s not only really tasty, but it’s also significantly leaner than chicken, beef or lamb (for example). So you can have a delicious meal eating a much healthier alternative!
The following recipe is taken from The Spruce Eats. Not only is it really straightforward to make but it will only take 5 minutes of prep before you let the slow cooker do the rest!
Rabbit Stew Recipe
Serves 4
Ingredients
- 2 rabbits, cleaned and cut up
- ½ tsp kosher salt
- ¼ tsp freshly ground black pepper
- ½ tsp paprika
- 2 tbsp oil
- 2 small carrots, diced
- 130g chopped onion
- 170g canned sliced mushrooms, diced
- 2 sprigs of rosemary (or thyme)
- 300g cream of mushroom soup, undiluted
- ¼ tsp Worcester sauce
- 130g soured cream
Preparation
- Heat the oil in a pan over medium heat.
- Sprinkle the meat with salt, pepper and paprika and add to the heated pan, browning them for 2 minutes on each side before transferring to the slow cooker bowl. Overcooked rabbit is very tough, so don’t overdo it, you are just browning for flavour!
- Layer the carrots, onions and mushroom on top of the meat.
- In a bowl, combine the condensed soup with the Worcestershire sauce. Once mixed, pour over the meat and veg.
- Cover and cook on low for 5 to 6 hours, or until the meat is tender and thoroughly cooked.
- Add the soured cream, stir gently to blend, and cook for a further 20-30 minutes longer, or until hot.
- Serve with crusty bread and a side salad.

Poland
We visited Krakow specifically to go to Auschwitz, something I believe everyone should have to do to remind ourselves of what humanity is capable of so that we don’t repeat it. Sadly, too many have not learnt the lesson from history. Auschwitz was an incredibly sobering experience, however, this doesn’t mean we didn’t also get a chance to thoroughly enjoy the city of Krakow and what it had to offer!
Poland was yet another country where too much vodka was consumed! In fact, we joined a vodka tour with Eat Polska which was not only a lot of fun but also left me needing to sober up in McDonalds dipping chips into ice cream (which at the time felt like the culinary highlight of the trip!).

McDonald’s fine dining aside, we did also enjoy some truly delicious meals, one of which was the infamous Pierogi.
Pierogi are essentially dumplings which can have all manner of fillings, both sweet and savoury. The most common is ground meat, potatoes and cheese or sauerkraut and mushrooms. However, every restaurants served different options and we enjoyed everything from lentils and spinach to berries and cream!
It’s hard to pick a favourite, so for the purpose of trying to make Pierogi for the first time I’m going to for the traditional cheese filled version. I’ve taken the following recipe from Taste of Home.
Pierogi Recipe
Serves 8 Pierogi
Ingredients for Pierogi
- 2 large eggs
- 240ml of water
- ½ tsp salt
- 260g flour
Ingredients for Filling
- 1 large egg
- 1 tsp salt
- ½ tsp sugar
- Dash pepper
- 450g soft whole milk ricotta cheese
- 1 to 4 tablespoons butter, divided
- Soured cream, optional
Preparation
- Whisk the eggs, water and salt until blended.
- Gradually stir in the flour
- Transfer to a lightly floured surface and knead 10-12 times, forming a firm dough.
- Cover with plastic wrap and let rest for 10 minutes.
- Move on to the filling: whisk egg, salt, sugar and pepper. Stir in cheese.
- Divide dough into 4 portions. On a lightly floured surface roll each portion into 1/8 inch thickness and cut into a 4 inch round cookie cutter.
- Place 1 tablespoon of filling in the centre of each circle. Moisten edges with water, fold in half and press edges to seal. Repeat with remaining dough and filling.
- In a saucepan bring water to a boil. Add in pierogi (in batches if necessary) and simmer gently until pierogi float to the top and are tender (2-3 minutes). Remove once cooked.
- In a large frying pan heat 1 tablespoon of butter over medium-high heat. Add pierogi in batches. Cook until golden brown (1-3 minutes on each side), adding more butter as necessary.
- Serve with soured cream.

Since one of the most memorable (although I don’t remember much about it, but that’s good right?!) experiences in Krakow was the Vodka Tour, I couldn’t leave it out of this “virtual” tasting tour. The second stop on the Vodka tour was this amazing shop with over 100 flavoured vodkas on display of which we could pick any three to try. I was particularly fond of the Salted Caramel one so I thought I’d try and recreate it at home.
This recipe is taken from Mix that Drink website which has some great photos showing what the vodka will look like as the shaking process goes on.
Salted Caramel Vodka Recipe
Ingredients
- 20 soft chewy caramel sweets (approx. 150g), chopped in half
- 1 x 750 ml bottle of vodka (you want a smooth vodka that is drinkable on it’s own)
- Pinch of salt
Preparation
- Pour out a shot of vodka and enjoy it (you need to make space for sweets)
- Insert the chopped sweets in the vodka bottle
- Shake well.
- Over the next 4 days shake the bottle vigorously several times a day
- You may end up with white froth on top, if this is the case, strain the now caramel vodka through a coffee filter (you may have to use several filters)
- Before returning the vodka to the bottle, give the bottle a good clean to remove any residue.
- Once finished pour the caramel vodka into the bottle, add a pinch of salt (no more than 1/8th of a teaspoon) and give it a final shake.
- Your Salted Caramel Vodka is now ready to enjoy!

Romania
The final Eastern European stop is Romania. We came to Romania looking for wild bears, which we were lucky enough to see up close, however, we left having discovered their love for hearty tasty meals. Certainly not somewhere to come if you are watching your waist line!

Romania delivered so much more than we expected. The trip was organised by Much Better Adventures and Untravelled Paths and promised bears and castles. The bears were great and I will be writing another blog to talk about them in the near future, however the castles (including Dracula’s Castle) were simply too crowded to enjoy. Lesson, don’t travel to Romania in August!
Being part of the Eastern Block, I expected Romania to be grey and communist looking, however we were greeted by a French Colonial feel, with lots of green spaces, beautiful houses and wide boulevards. And outside of Bucharest we visited charming medieval towns nestled in the impressive mountainous countryside; we watched farmers plough their fields using oxen; and passed plenty of horse and carts as they ferried loads of grass from the fields back to the farms. It very much reminded me of my childhood, growing up on my mum’s farm, sitting on top of the cart of grass after Joaquin had cut it all by scythe.
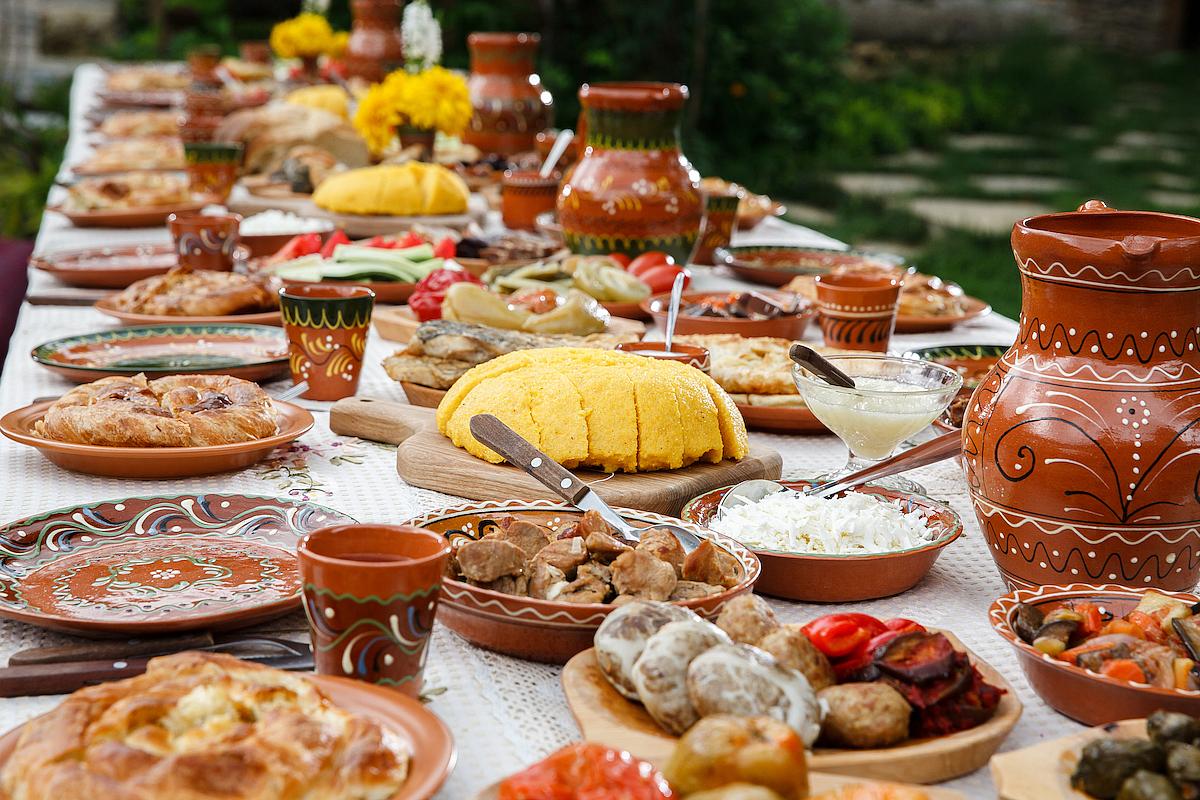
As well as not knowing what to expect culturally, I also didn’t know what would be in store for us culinarily. We were about to find out that we would be eating a lot of very delicious food! There is a lot foreign influence in Romanian cuisine, specially Turkish, Greek, Slavic and Austrian, so as you can imagine meat featured heavily (they say pork is their favourite vegetable!), as did soups, stews, soured cream and polenta.
My favourite dish though? Papanasi! These are fried cheese doughnuts served hot with soured cream and jam. Honestly, try them, you will never look back, they are delicious!
I have taken the recipe from Where is my Spoon, please do check the website out as it offers a lot more information about Papanasi than I have done.
Papanasi Recipe
Serves 8
Ingredients
- 500g cottage cheese – drained of excess water
- 2 eggs
- A few drops of rum aroma
- 75g granulated sugar + 1 additional tbsp
- 1 sachet vanilla sugar
- 250g flour
- 1 tsp baking soda
- Cooking oil for frying the doughnuts
- 250g sour cream to serve
- Whole fruit runny jam to serve (traditionally it would be blueberry but you can have your favourite flavoured jam!)
Preparation
- Put the cottage cheese, eggs, rum aroma, granulated and vanilla sugar in a bowl. Blend the ingredients until it becomes a rough paste. Don’t blend until the cheese becomes a smooth paste, you just want the balls to be a little smaller.
- Add 230g of the flour and baking soda and mix in with a spoon.
- Transfer the dough onto a floured surface and knead it lightly into a ball. The dough should still be somewhat sticky, yet manageable. Add the remaining flour only if necessary, i.e. if the dough is too sticky to work with.
- Divide the dough into 9 balls.
- Roll 8 of the balls into thick sausages and unite the sausage ends to create a circle with a hole in the middle.
- Use the last ball to make 8 little balls which will be used to top the papanasi.
- In the meantime, heat the oil over medium high heat in a pan. Use enough oil to have about 10cm of it in the pot.
- Fry the papanasi in batches (don’t overcrowd them in the pan, they need to be able to move freely). Fry the papanasi until they are golden brown (6-7 minutes for the larger pieces and 3-4 minutes for the little balls).
- Remove from the oil and place on kitchen roll to allow the oil to drain off.
- Serve warm, topped with a generous helping of sour cream and jam with the little ball resting on top.

Just remembering this dish is making my mouth water!
I hope that not only you enjoy the taste of the above recipes, but that they also allow your imagination to take you on an adventure of Eastern Europe.
And if you fancy something exotic but want it to be mega easy then why not try out Simply Cook? They send you the sauces and spices to make delicious meals and currently are running a promo which involves sending you the necessary ingredients for 4 meals!! To claim your free box (with free delivery!) you just need to follow this link https://simplycook.com/invite/DQRQC5. Disclaimer, I will also get a free box! And in case you are worried about being trapped into an agreement, don’t. You can cancel at any time without incurring any charges. However, be prepared to fall in love and want to keep trying more!
")
Comments will load here
Be the first to comment